 |
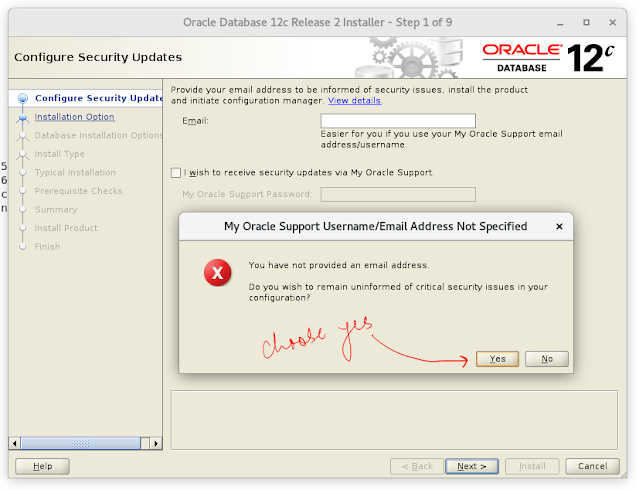
| This is the first screen for 12c R2 software installation |
When we start the 12cR2 Installer we get this screen and here uncheck this box if we don't want to receive security updates from Oracle support.
In this screen, we again see 3 options
In this screen, we will choose the YES option to proceed with the installation without oracle security support.
In this screen, we can see 3 options
Option #1 will install oracle 12c software and later on create a 12c database also
Option #2 will install the oracle 12c software only
Option #3 will be used if we want to upgrade the database for example oracle 11g to 12c
Option #1 will be used if we need to install Oracle as a standalone database [without cluster]
Option #2 will be used if we need to install Oracle with cluster [Normally used in RAC install]
Option #3 will install One Node RAC
In this screen, we can see two options. One option is to go with EE which has all features and it is more costly. While the second option is to go with SE it has less features as compared to EE and the license cost is also less.
In this screen we have to specify the details for ORACLE_BASE and ORACLE_HOME
ORACLE_BASE - config files / diagnostic files are placed here
ORACLE_HOME - the software is installed here with all the binary executables
In this screen, we are giving the location for ORACLE INVENTORY which is owned by OINSTALL group and keeps all the metadata files.
In this screen, we will assign different Linux OS groups to different roles. The benefit is that we have done role separation here and users in the specific groups will be able to do respective work.
In this screen, a pre-requisite check is being performed. we can IGNORE the checks by clicking on the Ignore all checkbox if we are sure that we can ignore it [ mostly we can ignore the warnings checks ]. In the lower section of the screen, we can find the problems and need to resolve them before proceeding with the installation [ for example we can see that oracle recommends having 3.5 GB of swap size ]
As we have chosen the Ignore all check box so oracle wants to confirm and we need to click on YES to proceed.
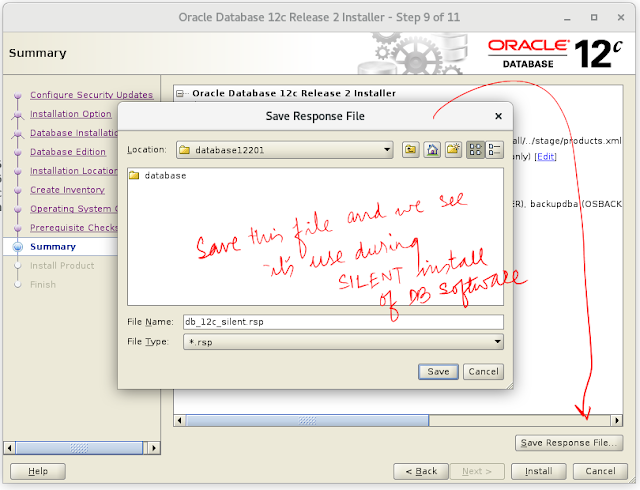
In this screen of the installation, we have an option to save all the settings we did on the previous screens into a file called the RESPONSE file and it can be used to do the Installation silently [normally we use it when we don't have X terminal with us to do the installation] I will show how to do the silent installation in upcoming posts.
In this screen, we can see that the final check is performed and we will click on the INSTALL to start the installation.
In this screen, we can see the installation happening and oracle software binaries are being copied to the ORACLE_HOME location as specified in the above step 5
Script #1 orainstRoot.sh
Script #2 root.sh
Script #2 root.sh - set the correct environment variables, will copy the environment variables to local/bin, and will create the oratab file which will be used by DBCA during database creation.
I hope this post will help the #oraclelearners :)
The next post is on Database creation
https://oraclemastery.blogspot.com/2021/11/oracle-12c-release-2-database-creation.html


