


In this post, I will show you step by step how to create a virtual machine in the virtual box
 |
| This is the first screen of VirtualBox |
After we install the oracle virtual box we get this screen and now we will create a Virtual machine to do our oracle 12cR2 installation

In this screen, we will click on the NEW button on the top and a wizard will open which will ask for the virtual machine name, specify the place where you want to put all the .vdi. choose the Operating system you want to install in the virtual machine and in the last choose the bit (32 or 64)
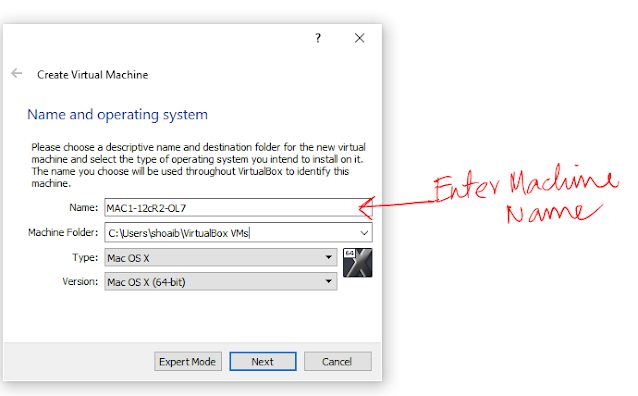
In this screen, we have specified the name of the machine as "MAC1-12cR2-OL7"

In this screen, we are looking for a place where we can park all the files related to the virtual machine

In this screen, we are creating a FOLDER in one of our drives

In this screen, you can see that we have created a folder named "MAC1"
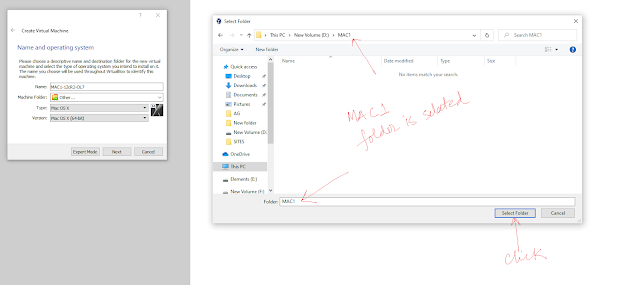
Choose the recently created MAC1 folder and now all the important required files of the virtual machine will be created in this folder.

In this screen, we are choosing the OPERATING SYSTEM and in our case, we are going with LINUX and 64-bit version

In this screen, we are allocating RAM to our Virtual Machine ( it is always better to give 8GB or 16GB but 4 GB will also work )

In this screen, we can see three options
Option #1 - if you want to create the virtual machine without any hard disk attached to it.
Option #2 - this will allow allocating a hard disk to a newly created hard disk.
Option #3 - if you want to reuse a pre-created harddisk ( choose the one which is not used by any VM )

In this screen, we are going forward with Option #2 and next, we can choose with different kinds of hard disk types and we will go with VDI (virtual box disk image )

In this screen, we can see two options we can go with Dynamic allocation (this saves the space) or with the fixed size option. I would recommend going with the first one.

In this screen, we have to specify the hard disk location and we will place the hard disk in the folder MAC1 which we created in the previous step and will specify the size of the hard disk. I would recommend going with 100 GB.

Now everything is set and we are ready to go. In the above screen, we can see different boxes related to machine info, RAM info, Storage info, Network info.

We will go to the virtual box setting option and there we will go to the storage setting

We will go to the virtual box setting option and there we will go to the storage setting, there we will choose the CD drive under the controller: IDE head

We will go to the virtual box setting option and there we will go to the storage setting, there we will choose the CD drive under the controller: IDE head then click on the CD drive icon on the extreme right which will pop up a drop-down menu and there choose the second option "choose a disk-file..."

Now go to the location where we have the ISO image of the Linux.

confirm that the ISO image file is visible under the Controller: IDE head

Now we will go to the Network setting and here we can see that we have four tabs to attach the network. By default network adapter in the first tab is attached as NAT ( we will keep it as it is )

we will go to the second tab

In the second tab, we will enable the check box and choose the "Host-only Adapter" from the drop-down menu.

Now all the prerequisite is done and we can START the virtual machine by clicking on the Green Arrow Start button.
I hope this post will help the #oracleLearners to create a virtual machine in Virtual Box for doing oracle testing.

No comments:
Post a Comment